About Me

"I may not have gone where I intended to go, but I think I have ended up where I needed to be" (quote from Douglas Adams). My name is Andrea. I was born in Belgium and live in Brussels. My passion for dollhouses emerged in my early twenties when I discovered a shop in downtown Brussels where they sold magnificent miniature mansions and furniture and decided that, one day, I would have my own dollhouse. Meanwhile, I had a life. When, in 2015, I visited Windsor and Queen Mary’s dollhouse, I decided it was time to get started with my own. After lots of brainstorming on how/where to start, I went for a dollhouse kit: the Malibu beach house. this blog is about the progress on the house and some tips on how I built and decorated the house.

Sunday 9 December 2018

Miniatures to resolve crimes

Image 6


Have you heard of Frances Glessner Lee, the "Mother of forensic science" and maker of "the Nutshell Studies of Unexplained Death"?
Frances Glessner Lee was born into a wealthy Chicago family in 1878. Fascinated by crime stories, she wanted to study forensic science, but her father was against it. Forensic science at the time was a men's world. In the thirties, after her father and brother passed away, she inherited the family's fortune and decided to invest it to help forensic science. She founded the Department of Legal Medicine at Harvard in 1936. She herself studied the subject around the age of 50. To help "freeze" crime scenes, she combined her hobby of making dollshouses (a popular hobby for women in wealthy families in the early 20th century) with her knowledge of forensics to make miniature crime scenes to help police resolve crime mysteries. She made about 20 nutshells, 18 of which are still used today to train detectives. These "nutshells" are now preserved in Baltimore where she lived, and not open to the public (although it seems they can be viewed by appointement in the Office of the Chief Medical Examiner). The dioramas were exhibited from October 2017 till January 2018 at the Smithsonian American Art Museum.
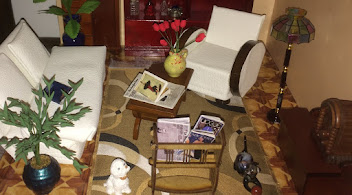
The "nutshells" were made in 1:12 scale, based on actual crimes scenes after extensive research, with objects placed carefully to provide clues to the crimes. They have an amazing level of detail, down to the cigarettes butts in the ashtray (cigatettes she rolled herself with paper and tobacco and half smoked to make them look real), copies of real newspapers, books with real pages, working locks on windows and doors. Fascinating!

Frances Glessner Lee passed away in 1962, leaving an incredible heritage to forensic science and legal medicine.

check out the picture gallery on the website of the Smithsonian American Art Museum here:
https://americanart.si.edu/exhibitions/nutshells


Saturday 8 December 2018

La maison de poupee bruxelloise


Hello readers,

I've made no progress on the house lately, as I was busy with lots of other things: spending time with my mother, visiting exhibitions, making Christmas cards (another one of my hobbys), daydreaming about the mini house (a lot of that....) and the usual household chores, but you don't want to hear about that.

Exhibitions of miniatures in Brussels are rare enough to give them special attention. « Mini Life » was held at the Porte de Hal in Brussels. It featured old miniatures from the end of the 19th century, beginning of the 20th century.

La Maison de Poupée bruxelloise

The main attraction was « The Brussels dollhouse », labelled La maison de poupée bruxelloise. It was made around 1900 by Jules Charlier, a Belgian engineer and electrician from Brussels. Although it was based on his own house, it’s not an exact copy. While the real house had 3 floors, the miniature only has 2. The real house was located on rue Froissart in Etterbeek, no. 54 (later changed to no. 70 in 1911 due to the expansion of the area). It was demolished in the 1990s and no records have been kept other than a photograph of the facade. According to the family, the miniature took around 10 years to make. Jules Charlier never married and his sister, Jeanne Charlier, gave the dollhouse to her sister-in-law, Marthe Verhas, who then donated it to the Musée des Beaux-Arts in 1941. No-one knows if the inside of the house was copied from the real house, but it does show the style of furniture common in middle-class houses of the early 19th century.
The miniature house opens on both sides


The couryard at the back of the house


More information on the  Brussels dollhsouse and exhibition details can be found in the exhibition brochure (€7.00 – lots of photos) available here: http://www.kmkg-mrah.be/fr/la-maison-de-poup%C3%A9e-bruxelloise.

More photos of the exhibition to come soon....

Sunday 18 November 2018

Tiling and lighting.
The tiled floor of the hallway is also finished. Made with marbled glass mosaics. I had to add a wooden frame as I did not manage to cut the mosaics, they broke into pieces when I tried, so after breaking half a dozen, I gave up. It's not so bad, even though I would have preferred the tiling to go from wall to wall. The trickiest part was the front. There, I used smaller resin tiles. When I proceeded to sand them with the dremmel, I overdid it and the result is not perfect, but I shall have to live with it now (no picture of that).


The slight disappointment of the hallway tiles was soon forgotten when I installed the wall sconces and lit the place. Below is the result. In my next post, I will explain how I made them, under the tab "items home-made". That's all for today, I just don't have enough with 24 hours in one day to do all the things I would like to do, and post everything on this blog. Be patient, it will come.


Progress on the ground floor. The fire surround is finished. I used balsa wood with 3 coarts of dark wood stain varnish. To cut the metal plates inside the chimney was not easy. My mum got me a dremmel tool for my birthday and for my first try, the cut was not exactly straight. Never mind, it does not show. The dremmel is fantastic. It's so much easier to make things when you have the right tools. Anyway here is the finished fire surround with shelving on either side, which was quite common in thirties houses. You will notice I also added the skirting boards and picture rail.


Here with some decorations. The two vases were a gift from my friend Rita (thank a million Rita, I love them!). They are made of glass and seemingly hand painted, so delicate and beautiful. I think they look nice on the chimney. The fire screen is from a Dutch artist: Arjen Spinhoven (https://arjenspinhoven.nl/) and was bought at a fair in Holland last year. It's laser cut and comes in a kit. I painted it with silver metallic paint. The clock is a brass, non-working clock I found in a very unlikely place: a beach shop in Knokke-Heist, selling beach gear and toys. They also had a brass oil lamp.


The door between the hallway and the kitchen is glued in place. Cranky, I forgot to install the door handles BEFORE gluing the door in. Doing that while the door was in place was a bit of challenge, but eventually I managed that. Also at first, I used tacky glue which did not hold the handle in place and made a mess. I had to remove everything and cleaned it quickly before it dried. On the second attempt, I used super-glue and almost glued my fingers together in the process.
I must remember to install the handles before installing the doors on the upper floors....
For the door decoration and handle plate, my scrapbooking cutting dies came in handy.
If you click on the pictures, you can enlarge them and see the details.


Sunday 28 October 2018

Art work

My other hobby is painting. My last painting was finished in June (real size) and it recently occured to me that it would look nice in the mini house too. The plan is to reduce the picture and print it on canvas.


Other paintings will include a couple from Georgia O'keefe and one from Tamara de Lempicka. For the rest, I'll think about it as I go along. I also quite like Klimt, we shall see.


Trial and error.....
One piece of advice before you start anything: make templates and put everything together without gluing anything until you are satisfied with the result. Then sleep on it, in case a better idea comes to mind overnight.

A little mistake I've made is gluing the door frame on the kitchen side before putting the door in on the hall side. So, it's not quite aligned - fortunately it does not show.

As I'm already sorry for not having put real tiles in the kitchen, I decided to put real ones in the hallway. I found some nice mosaic tiles from Rayher with sort of a marble effect which makes it look more interesting than just pain black & white. Not sure that kind of tiles existed in the thirties, but it doesn't really matter, I'm not looking to make the house true to the times, but rather to give it an interesting look.

Tiling: easy job, thought I. Well I've had to think again. From wall to wall, it's 13 cms while the tiles measure 2x2 cm. As any child will tell you 13/2=6.5, which means half a tile at one end. I've ruined quite a few trying to cut them. No way am I buying more tools. This isn't working for me and won't like the look of it; I've had to think of a way to circumvent this problem: a border.

Also, learning from my mistake with the floorboards (see previous post: not quite straight towards the end), I set out to align the tiles on the table first. Aha, better make a template to ensure proper alignment throughout....


 Meanwhile, I've also realised that, before gluing the skirting boards along the walls of the living room, I first need to finnish the fire surround, otherwise the latter will need some fine cutting to accomodate the skirting board. Good job I did not have time to glue the skirting boards last week, which gave me time to think. I really must learn not to rush things (patience is not one my strong points). The fact is, I already spend so much time thinking about things, that the day is gone by the time I am ready to actually do something.

So today, refusing to think too much about, I started with gluing some tiles around the chimney. Fortunately, the glue does not set in quickly and I was able to adjust them. I'm not too keen on grouting them, but then I may need to if I want to give them a "finished" look. Why on earth did they make the chimney base 2 cm high! Then again, it allows for steps as stepped tiled surrounds were typical in the thirties, often a creamy/beigy colour. I did not have cream tiles so I settled for black (large tiles) and grey (small ties). Here's the progress on the chimney so far:


It will look better when finished, I hope..... Then again, I am no professional photographer :o)


Sunday 14 October 2018

Hello all,

The kitchen is now finished and operational. The one thing which remains to be added is the lighting - no easy affair this, plus I can't make up my mind which lights to use. Hopefully it will be done by Xmas.


Emma, the maid, has baked fresh bread.


Coffee is brewing on the stove and the eggs and sausages are ready for breakfast.


Another finished thing: the chaise longue which I had started a while back. Finally put all the pieces together - A little small I think but too late now. ...


Sunday 23 September 2018

Living room floorboards finished.  I am well pleased with the result. As I got to the middle, I realised it was not going to be straight at the finnish line and had to make some adjustments. Fortunately, it does not show. On the picture you get a glimpse of the screen door that will separate the living room from the hallway. Still to be finished with a screen. This was an old chinese calendar my mum got in a chinese restaurant decades ago. I removed the calendar and still have to decide what to replace it with. It so happens it's the exact size for the house.
The skirting boards and pictures rails will be added soon (varnish currently drying).


and kitchen decoration complete (well almost.....).I changed my mind eventually about the kitchen floor tiles. This one is more 30s-like. Pure black and white would have been too sharp, I settled for cream and black checkered tiles paper. I may put real tiles one day.
The skirting boards and door frame were varnished in dark wood tone.
Next time, you will see the kitchen with furniture. Check out the kitchen boiler I made under "some items home made" tab.


Sunday 2 September 2018

Ground floor wallpaper is complete, now working on the floorboard.

Since the house arrived, I have painted some of the window frames, put up the wallpaper in the kitchen, hallway and living room. On the inside, the woodden parts are stained and varnished.

For the kitchen walls, I used scrapbooking paper. For the kitchen floor, I am in two minds about keeping the paper tiles as shown, or go for something else.

The hallway paper is embossed carstock. The motif is Art Deco although it does not show very well on this picture. To the left is the living room....

For the living room, I found a fabric at Maison du Monde (actually a huge tablecloth) that had exactly the pattern I wanted. I glued the fabric onto cardstock, cut the edges and then glued that to the walls.
If you want to know more about wallpapering options, click on the "wallparing" section (coming soon). The chimney is covered with the same embossed cardstock as the hallway.


I also started the floorboard for the living room. As the Malibu Beach house will be all glued together, changing the wallpaper or floor covering will be extremely difficult. So you need to find ways to be able to change it later, working through the windows. That's why the floorboard will be in 2 pieces. That's also why I glued the facric for the walls onto carstock so it can be easily removed and replaced using the existing cardstock as template. Below is the left-hand side section.

Some tips of making your own floorboards on this page (coming soon).


Sunday 26 August 2018

So in March, the Malibu Beach House kit arrived. I was impatient to unpack, but I have to admit a was a littled baffled when I opened the boxes and discovered all the bits and pieces that I was going to have to paint/varnish and assemble.
Following the experts' advice, I dry-built the house first to make sure all the pieces were there and that everything fits. They were, and it did. Woaw, bigger than I thought!
I was in two minds at the time of ordering and uncertain as to whether it could be turned into an Art Deco house. But now that I have started work on it, I am happy with it. In fact, the more I think about it, the more I like it. It's just that it will take a lot more time to finnish than I had first anticipated.
Never mind, that was the idea after all, the fun and satisfaction of something made by me.
Only, it's now August, and progress has been slowed down because I have been distracted into making things for the house. The fact is, I have so many ideas and not a lot of free time to turn them into actual projects. My latest home-made item is the grand Art Deco chandelier I've had in mind for some time. (photos to follow)
So here is the house, dry-built (without the windows)