About Me

"I may not have gone where I intended to go, but I think I have ended up where I needed to be" (quote from Douglas Adams). My name is Andrea. I was born in Belgium and live in Brussels. My passion for dollhouses emerged in my early twenties when I discovered a shop in downtown Brussels where they sold magnificent miniature mansions and furniture and decided that, one day, I would have my own dollhouse. Meanwhile, I had a life. When, in 2015, I visited Windsor and Queen Mary’s dollhouse, I decided it was time to get started with my own. After lots of brainstorming on how/where to start, I went for a dollhouse kit: the Malibu beach house. this blog is about the progress on the house and some tips on how I built and decorated the house.

Sunday 2 September 2018

Ground floor wallpaper is complete, now working on the floorboard.

Since the house arrived, I have painted some of the window frames, put up the wallpaper in the kitchen, hallway and living room. On the inside, the woodden parts are stained and varnished.

For the kitchen walls, I used scrapbooking paper. For the kitchen floor, I am in two minds about keeping the paper tiles as shown, or go for something else.

The hallway paper is embossed carstock. The motif is Art Deco although it does not show very well on this picture. To the left is the living room....

For the living room, I found a fabric at Maison du Monde (actually a huge tablecloth) that had exactly the pattern I wanted. I glued the fabric onto cardstock, cut the edges and then glued that to the walls.
If you want to know more about wallpapering options, click on the "wallparing" section (coming soon). The chimney is covered with the same embossed cardstock as the hallway.


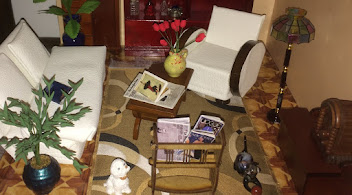
I also started the floorboard for the living room. As the Malibu Beach house will be all glued together, changing the wallpaper or floor covering will be extremely difficult. So you need to find ways to be able to change it later, working through the windows. That's why the floorboard will be in 2 pieces. That's also why I glued the facric for the walls onto carstock so it can be easily removed and replaced using the existing cardstock as template. Below is the left-hand side section.

Some tips of making your own floorboards on this page (coming soon).


No comments:

Post a Comment